
In-keeping with the trend of the last few posts, I discuss here some design coursework completed as part of my engineering degree. This was a integrated product design task, which allowed for a bit more creativity than some of my other projects. I’m really happy with how the final product looks, and am also confident it could actually be made! Images can be enlarged by clicking on them.
Brief and ideation
Our brief was straightforward: redesigning a cheap mass-produced robot vacuum in the style of a famous brand.
I bent the rules slightly and went for 20th century Braun: drawing especially from Dieter Rams and Hans Gugelot’s period-defining work. Aesthetics were not the sole consideration and our design also had to improve on functionality and assemble-ability. This meant thinking carefully about design philosophy – Rams’ “10 principles for good design” guided my initial sketching.
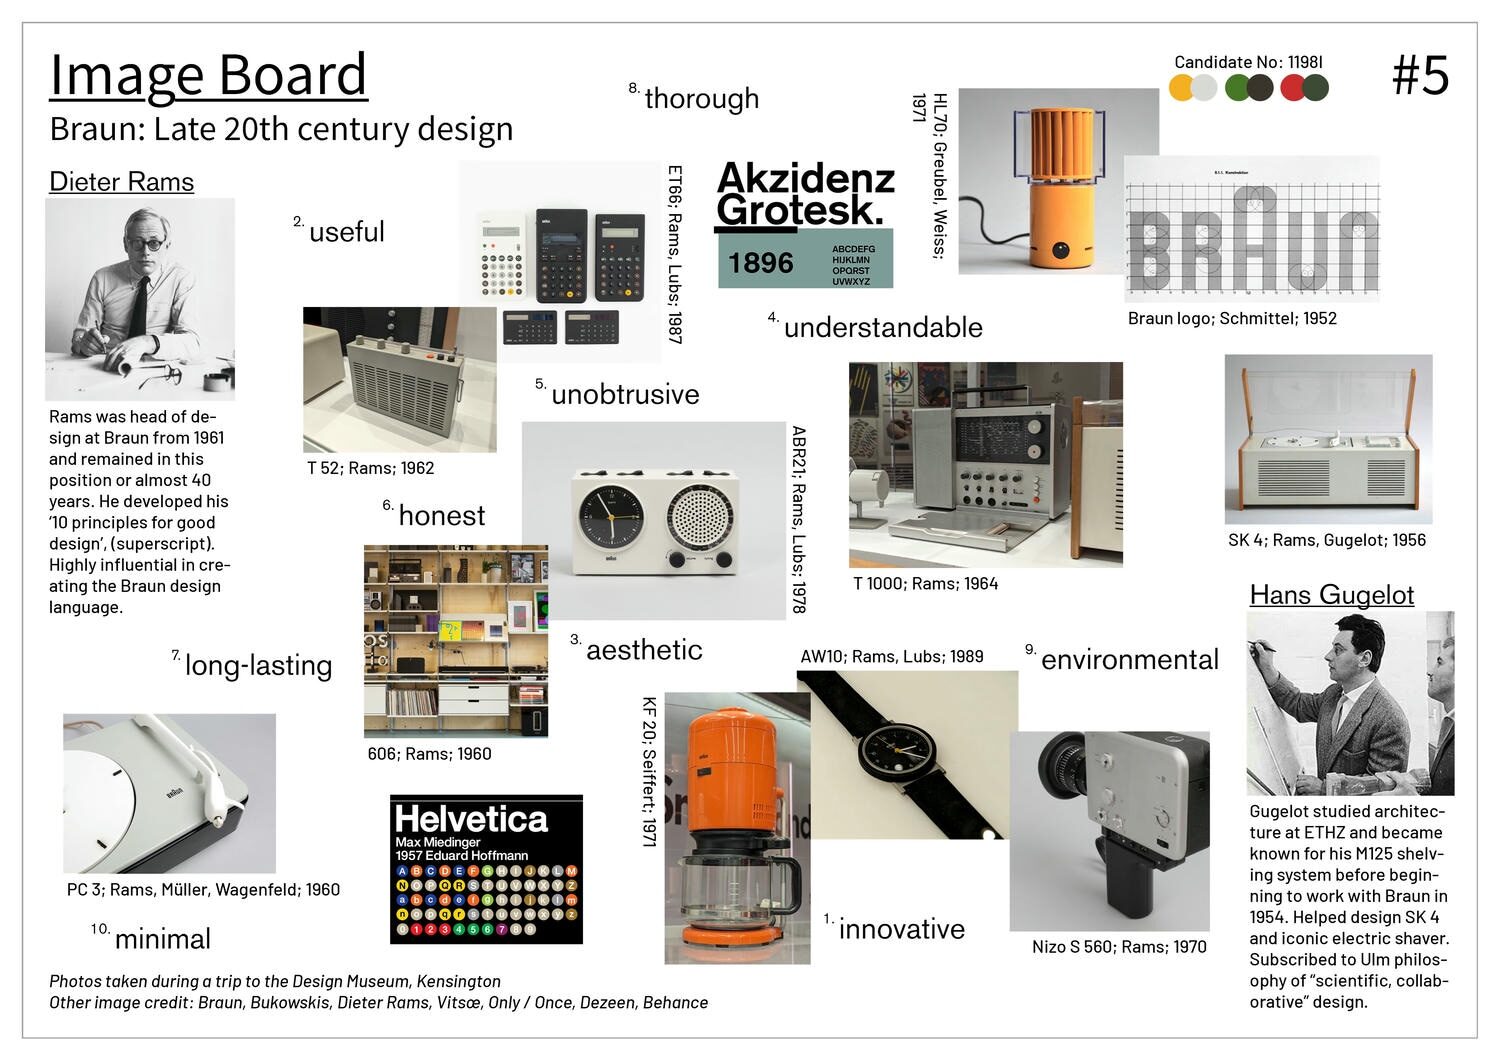
While working on this, a visit to the Design Museum in Kensington gave me the opportunity to see many of Rams’ products in person. I attempted to include shapes, form and interfaces that reflected these works in my design: blocky plastic bodies, brightly coloured buttons, matt sheet metal panels, contrasting light/dark colours.
Iterating through multiple separate initial ideas helped me avoid fixation on a single design and eventually I settled on a rectangular vacuum centred around a visible fan as a starting point.
Design development
After moving into CAD, my early design development was plagued by an attempt integrate all functionality into minimal parts. This meant guiding airflow through channels in the chassis and fitting the drive and electronics in-between – doing this within the limitations of injection moulding (minimal undercuts, constant thickness) proved difficult and led to a convoluted design which would be hard to repair in the case of failure.
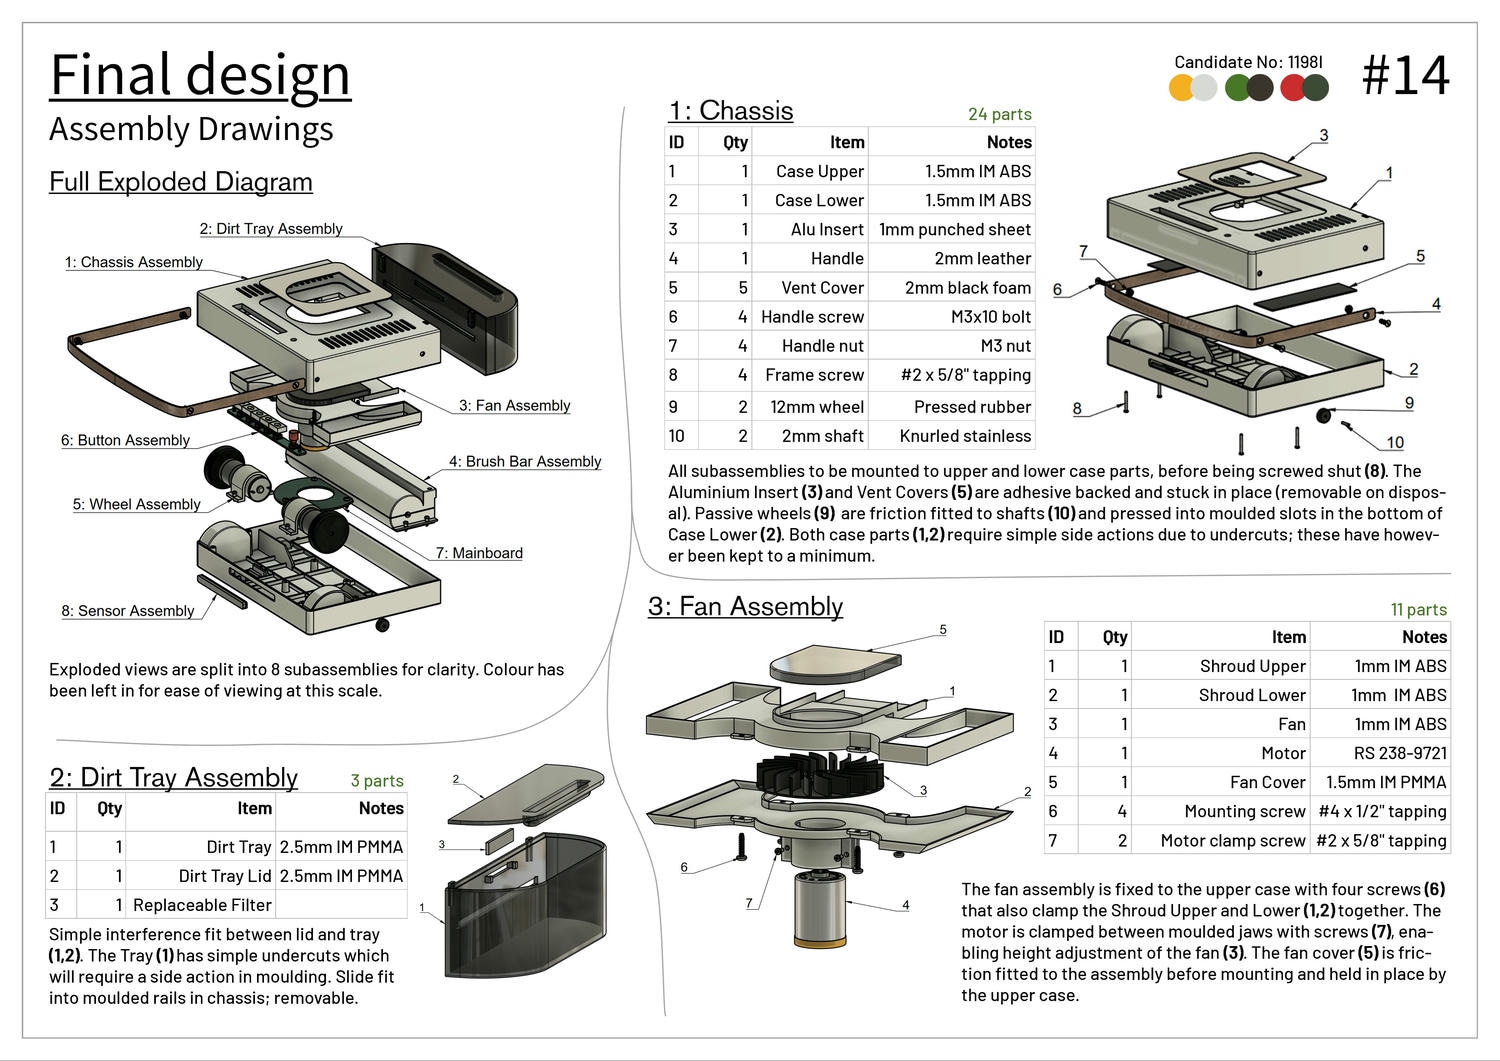
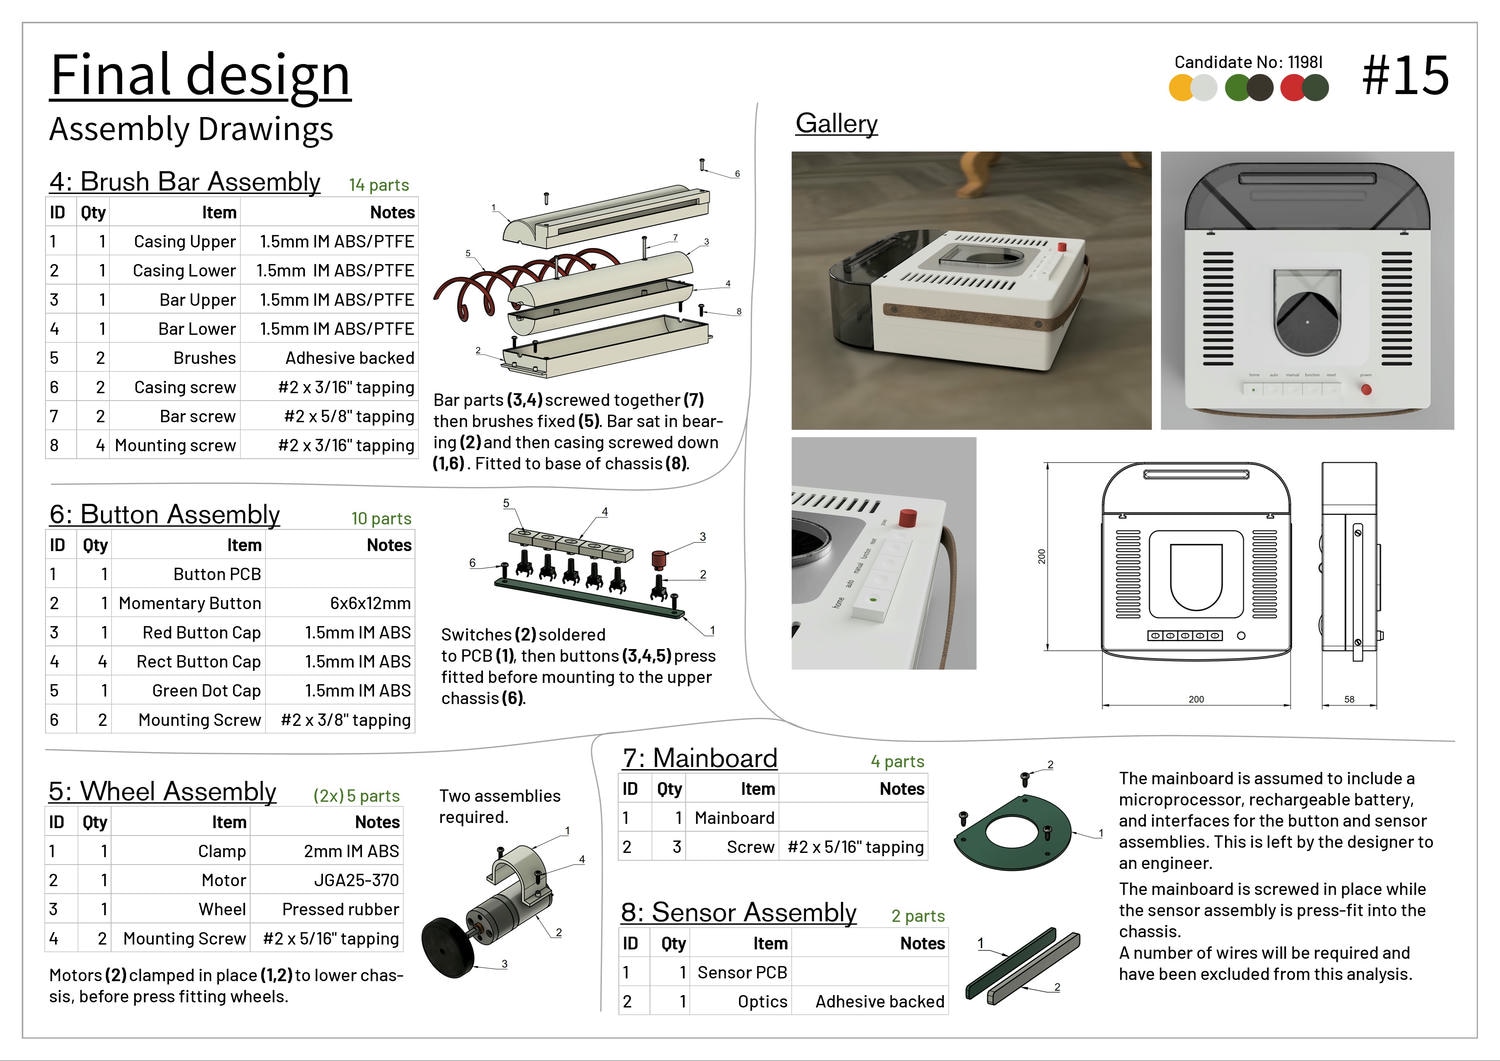
Later, I adopted a modular design approach which was far more sensible. Each module was designed independently with manufacturability in mind. The eight key sub-assemblies are shown below.
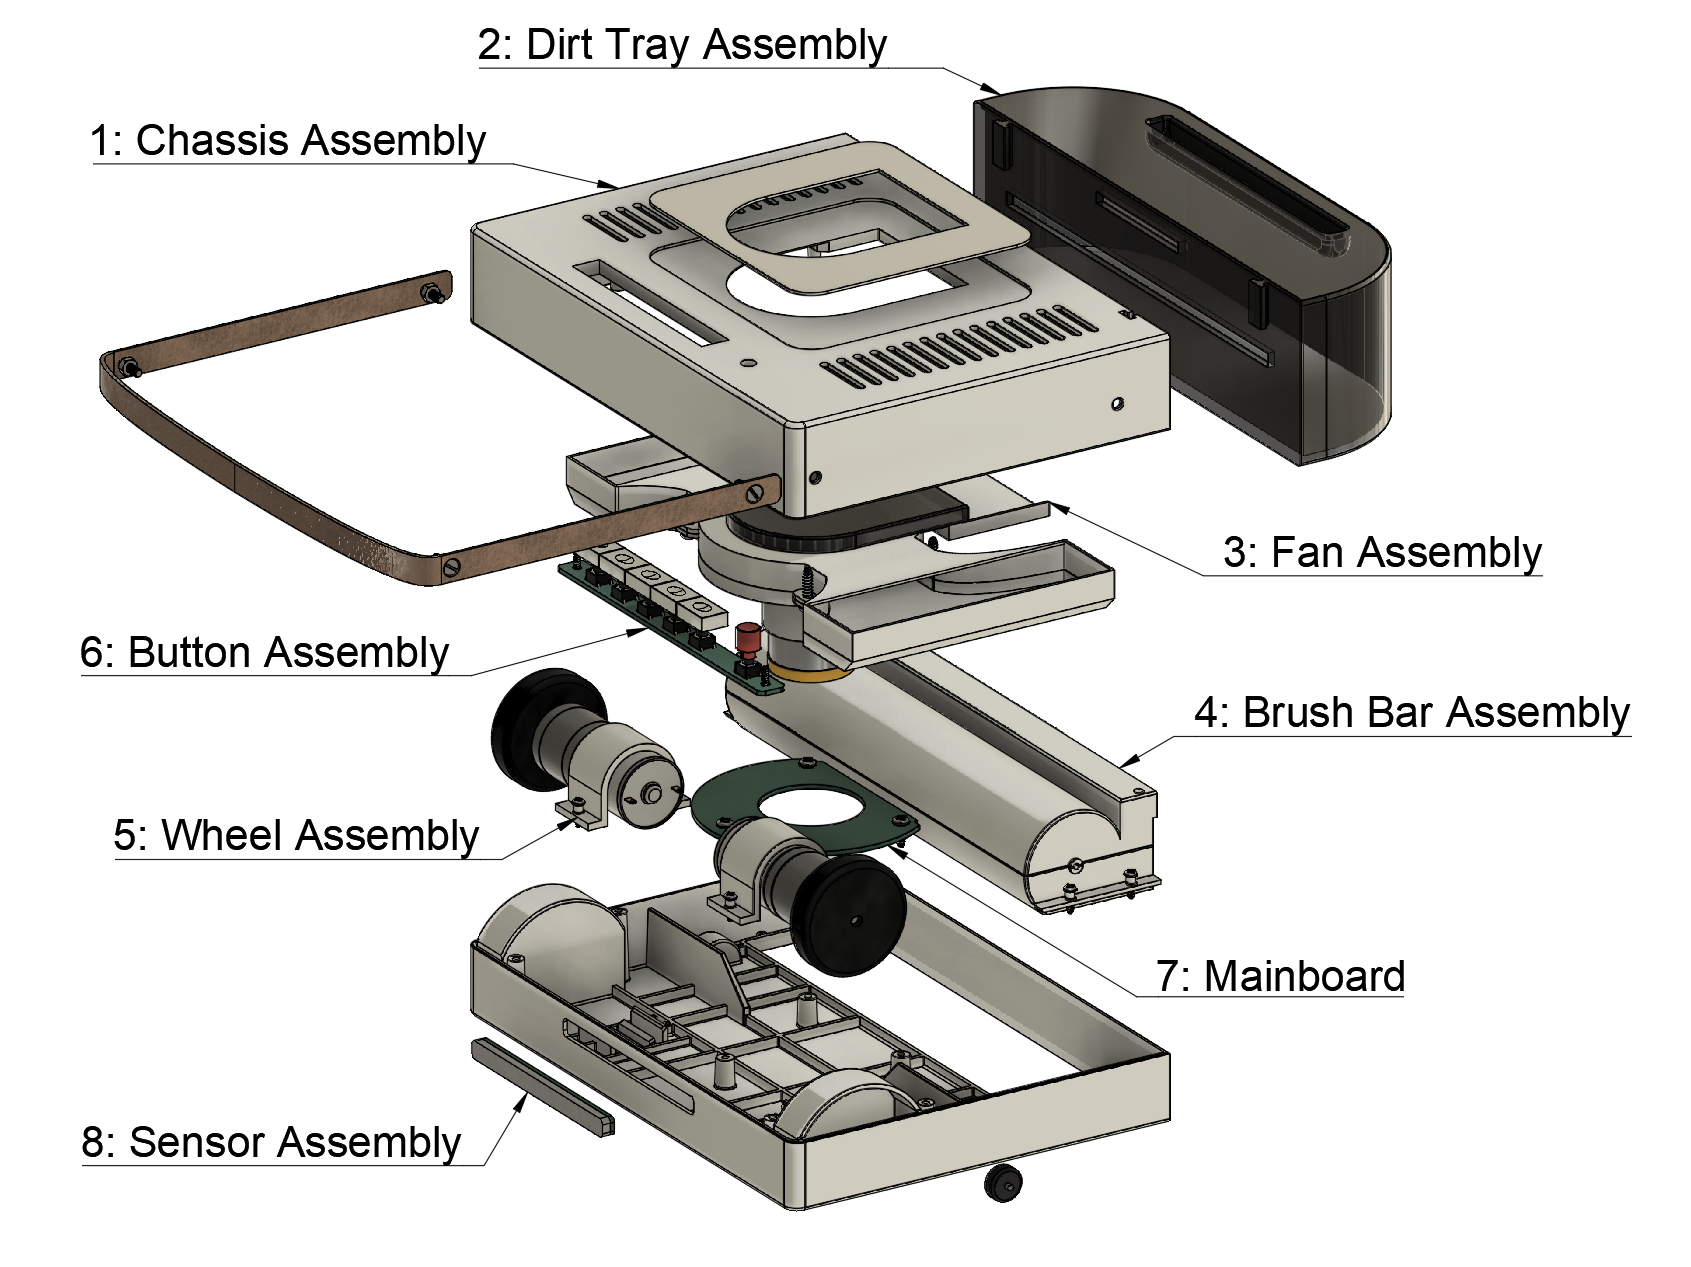
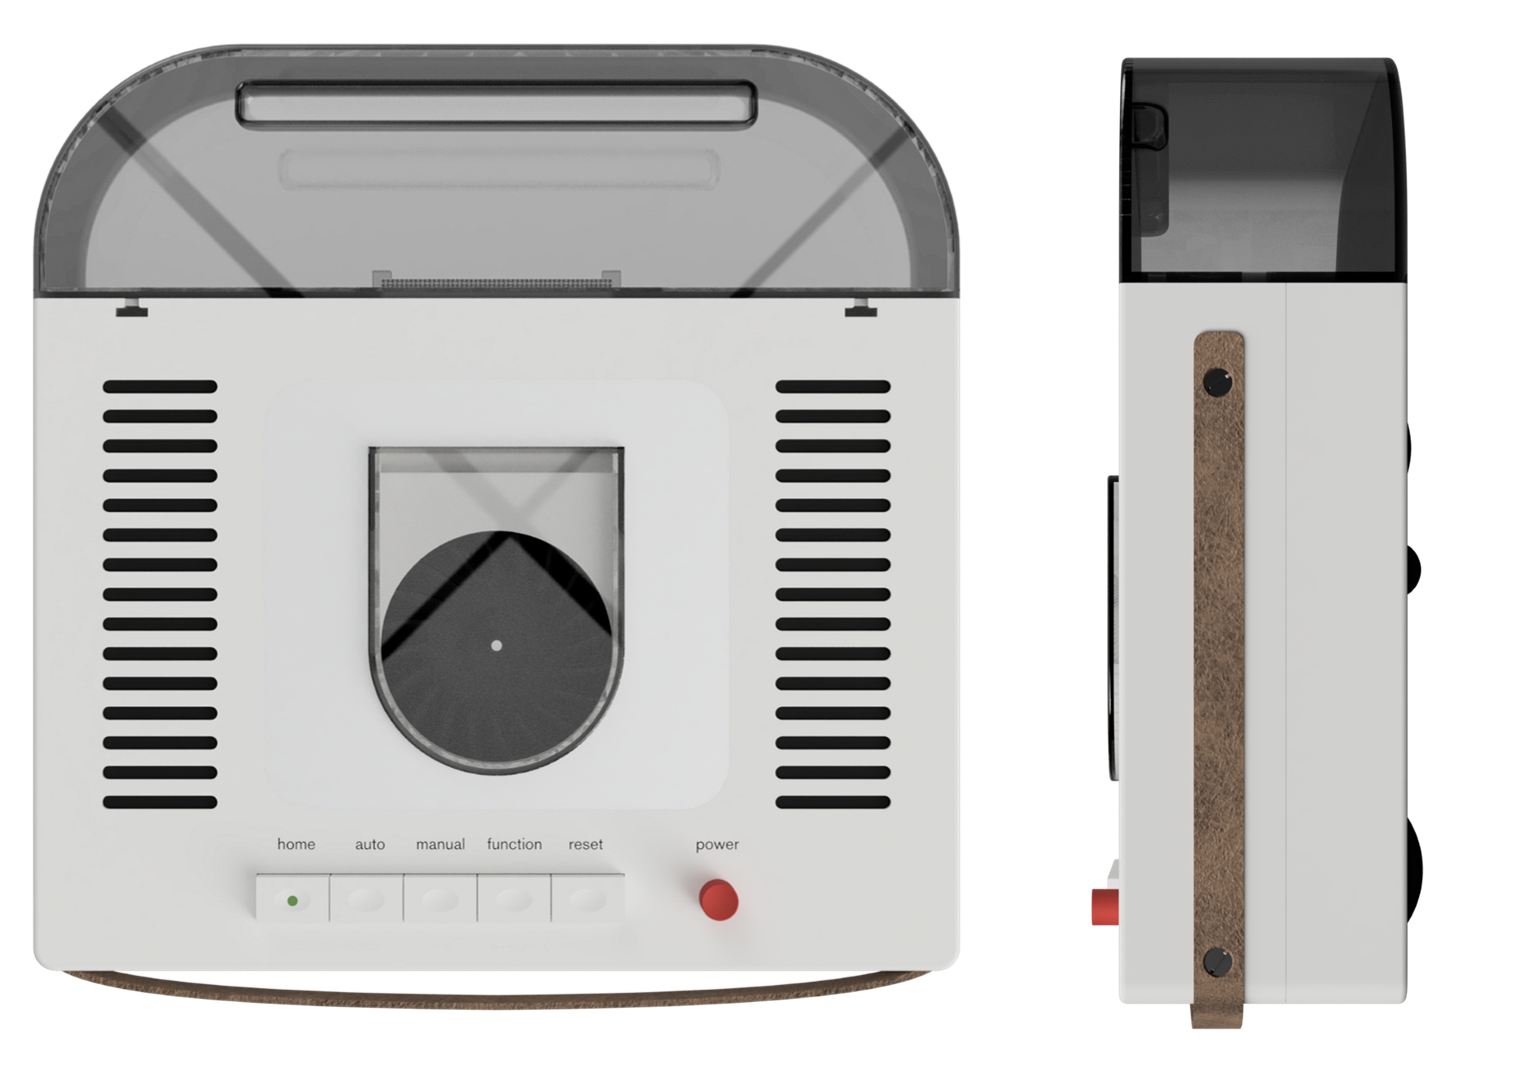
Working in Fusion 360’s plastics environment made designing the chassis (1) straightforward.
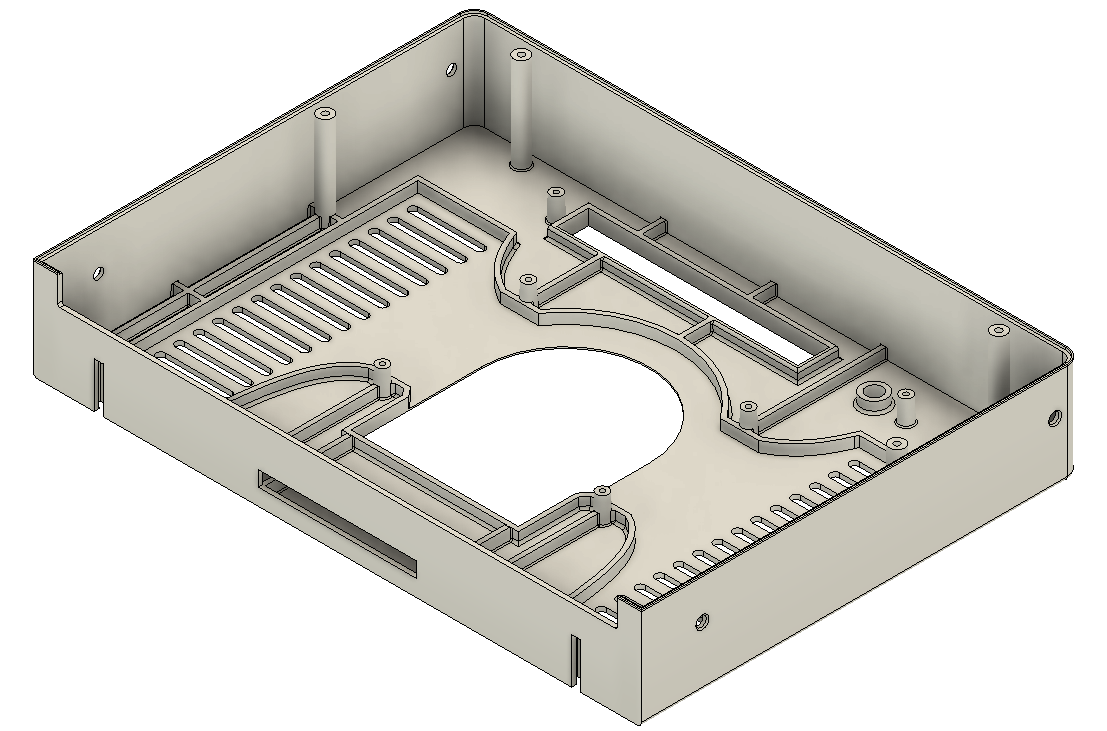
Creation of bosses, lip and grooves, draft angles and webs are single operations. I started with the general shape I knew the product needed to be. Once I had added the functional openings and vents it was easy to reinforce the casing, add fixing points and ensure manufacturability with a standard draft angle.
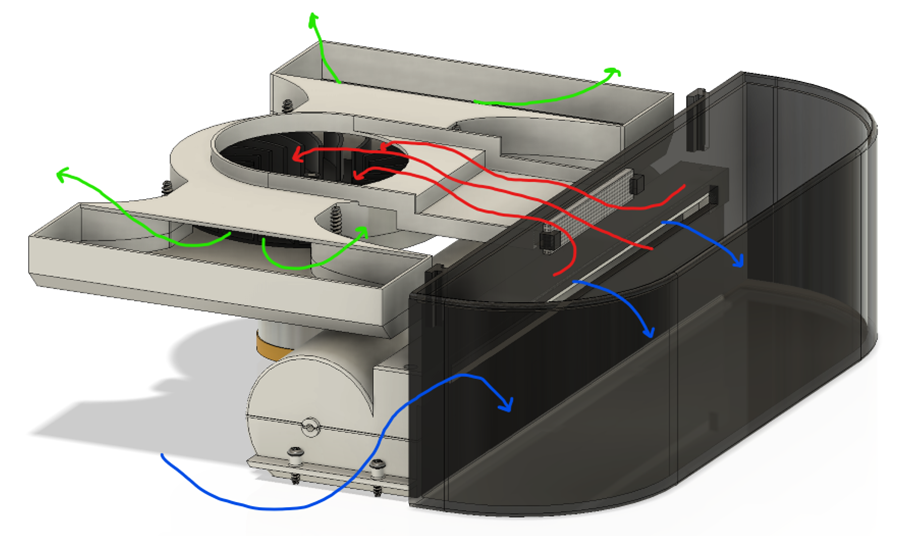
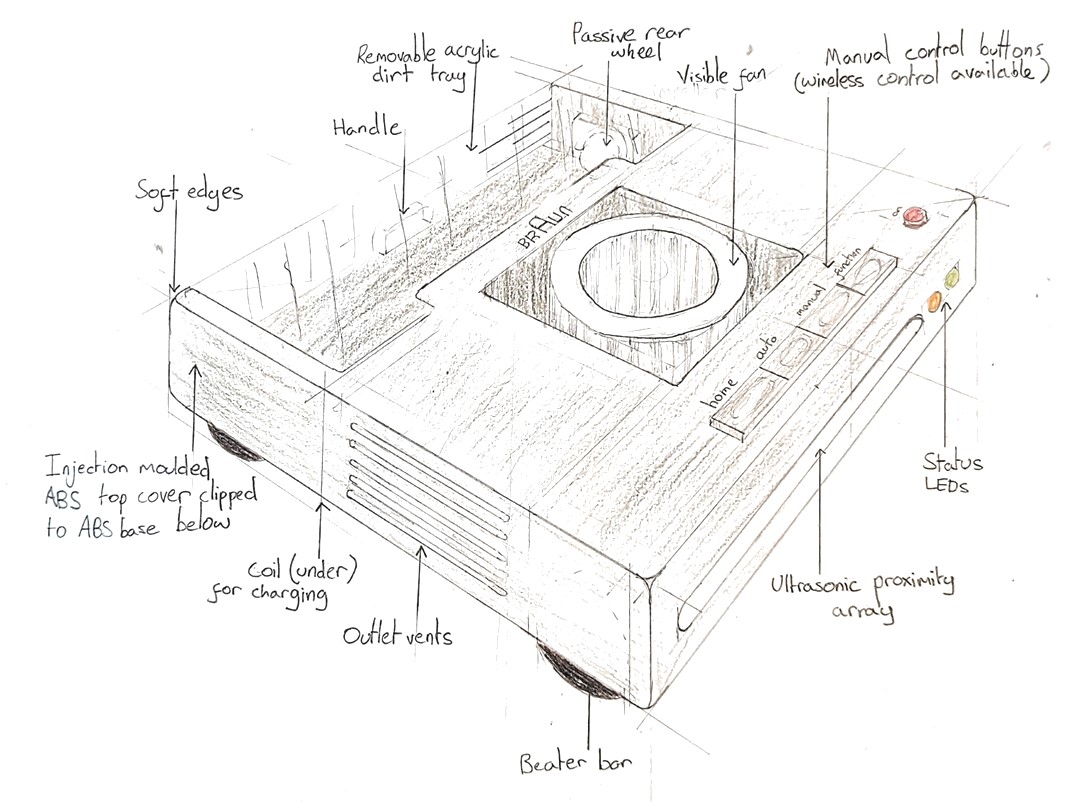
The effectiveness of the vacuum was improved by specifying a much larger motor around which the chassis was built. Air is drawn up through a ‘brush bar’ assembly (4) as is found on many high-end vacuums. Debris/air enters the dirt tray (2), is deposited,and clean air exits through the fan assembly (3). The dirt tray is transparent and easily removable for emptying.
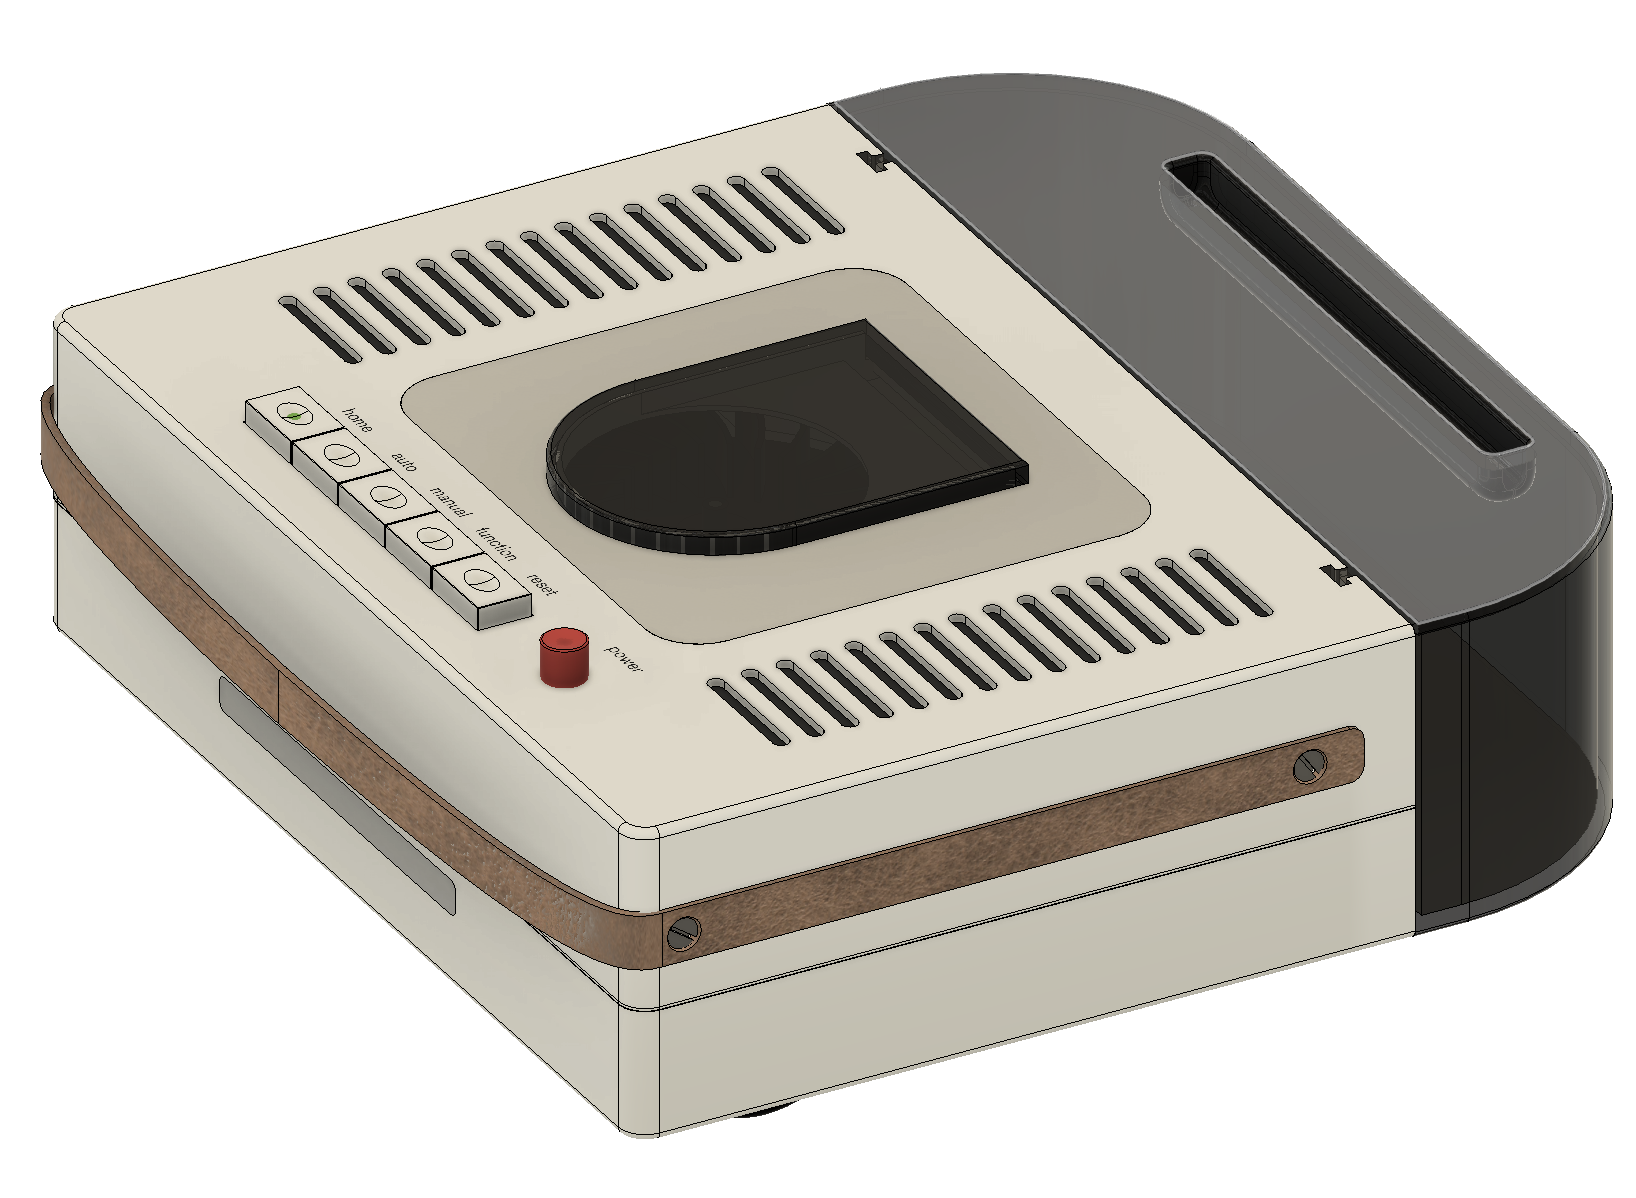
The product is finished with a recessed metal plate on top around the visible fan and some signature Braun-style details. These include classic dimpled buttons and a brown leather carrying strap as found on the Transistor K. Symmetric vents on the top allow air exit and complete the Rams look.
Final design
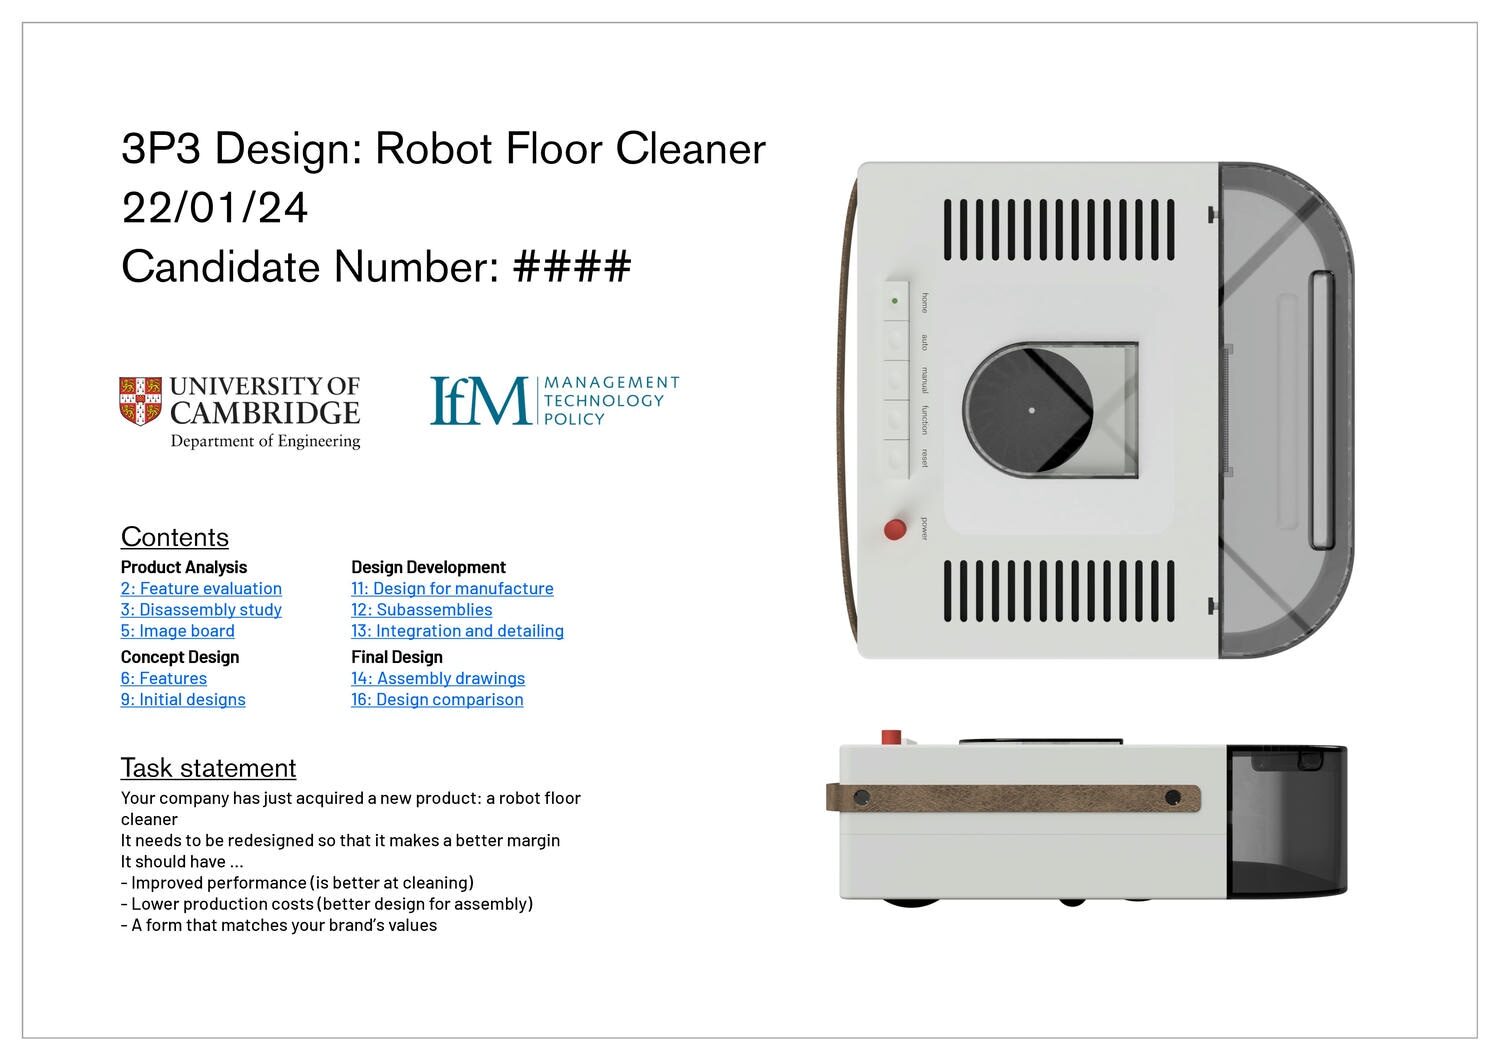
The full design portfolio PDF is available here.